Lighting is everything in your applications to #Cafdgg

Categories
I have just finished sending all the photographs and links to the Panel who help me curate the artists who will be exhibiting at #Cafdgg for this November, and one or two artists whose work I know presented poor photographs and which really let their application down and I had to endorse their application to get them through the application process.
The better the photographs the more professional your work will look and automictically you will have more artistic gravitas. Poorly lit and out of focus photographs put forward a view of slap dash unprofessionalism and lack of respect for your work.
So here is a brief guide on the most important thing in taking photographs – LIGHT!
Use natural light
The most obvious and simplest option is to use sunlight. When getting ready to shoot anything on camera, let the sun shine directly onto your piece of work. This will provide a beautiful, even light that helps brings depth to your photos.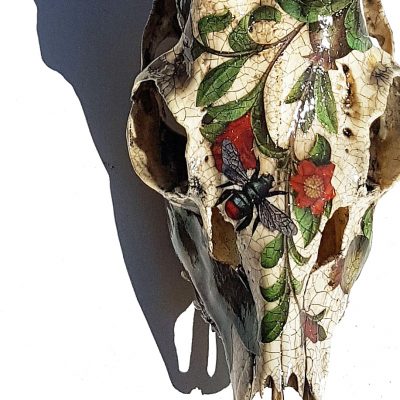
If you are taking photos in full sun and shadows mar the detail of your work, use a very sheer white net curtain or fabric, even a translucent white shower curtain which can defuse the light into something softer.
Although using deep shadows can add drama and throw the emphasis on details of your work as shown by Jo Verity’s decoupaged skull.
Fiona Kingdon uses her fret working skills to produce simple lamps that look spectacular when illuminated illustrating the fineness of the wood grain used. http://www.fionakingdon.com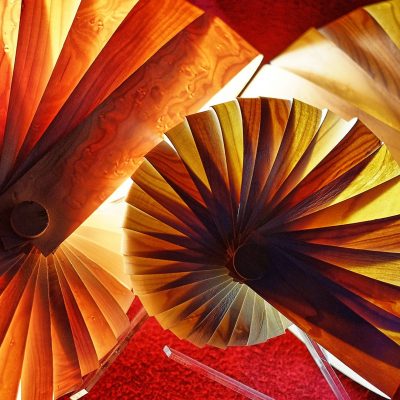
A three-point light for low-light rooms
For more traditional lighting, keep the window to one side of your artwork, whilst the other side can be filled with lighting from a daylight coloured bulb in an Anglepoise lamp to even out the light distribution.
If you can still see dark shadows on your artwork, you will need to add bounce back lighting. You can buy a professional small bounce, although I would suggest you use a piece of white card stock for a softer natural light fill or aluminium foil for a stronger fill to bounce the light from the window back onto your artwork.
You can make a small studio by folding white stock card into a V shape then propping up for your work on the base of the V for more controlled lighting as Matthew Warburton uses
Photographing on a light box gives beautiful reflections with a soft defused light, although make sure the background does not distract from your artwork. Jane Moore creates enamel jewellery http://www.janemoorejewellery.co.uk and uses a white background for maximum effect.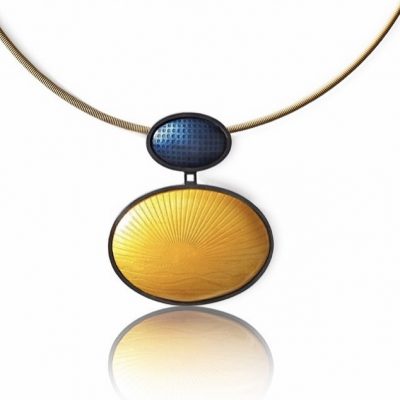
Use lighting to emphasis the unique beauty of your work, for example with translucent decorative glassware the colours shown by the light going through the glass make an arresting coloured shadow effect enhancing the mood of the photograph as shown here by Kate Webley http://www.pod4art.com 
For night-time/ low light photography
Use two daylight-coloured bulbs in lamps, one on your left and one on the right of your artwork and a bounce behind. These two lamps should help minimise shadows and evenly light your artwork.
For photographing outside
When using your phone camera try the Portrait mode to focus tightly on your artwork and blurring the background. Edit to tightly crop the photo to keep your artwork the focus in the photograph. Niki Crew’s Christmas decorations are placed appropriately and use the portrait setting on a phone beautifully.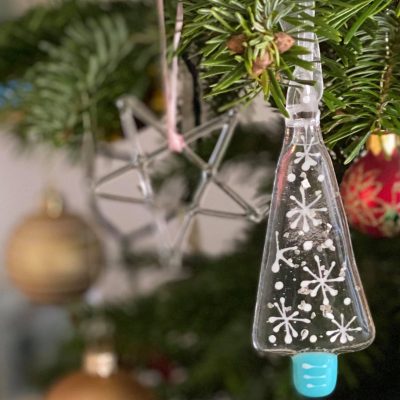
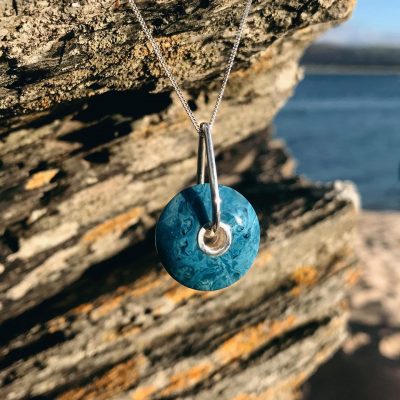
If you want the background to tell a story about your artwork, make sure it is relevant and as in this photograph by Caz Brogden and her surfeit and silver ring hewed from up cycled surf board resin.http://www.carolinebrogden.co.uk